Looking for a step-by-step guide on how to Zmail? Our webpage provides all the necessary details you need to know, so you can easily access your Zmail account hassle-free. From account setup to troubleshooting common issues, we’ve got you covered. Check out our comprehensive guide to Zmail login today. In this guide, we will discuss the Zmail Login process, how to overcome common login issues, and how to troubleshoot any problems you may encounter.
Zmail Login Process
Before you can log in to your Zmail account, you need to create an account. The registration process is quick and easy, and you can do it by following these steps:
- Go to the Zoho Mail website
- Click on the “Sign Up Now” button
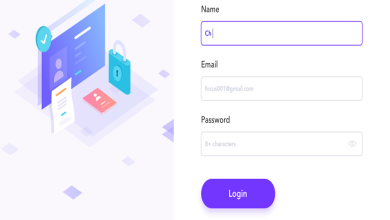
- Fill in the required information, including your name, email address, and password
- Choose your country and time zone
- Click on the “Sign Up” button
Once you have created your account, you can log in to access your Zmail account.
How to Log In to Your Zmail Account
Logging in to your Zmail account is simple and straightforward. Follow these steps to access your account:
- Go to the Zoho Mail website
- Click on the “Sign In” button located on the top right corner of the homepage
- Enter your email address and password in the fields provided
- Click on the “Sign In” button
If you have forgotten your password, you can reset it by clicking on the “Forgot Password” link and following the prompts.
Understanding Your Zmail Dashboard
Once you have logged in to your Zmail account, you will be directed to your account dashboard. The dashboard provides you with a variety of features and options to help you manage your email, calendar, and contacts. Here are some of the key features of your Zmail account dashboard:
Inbox
The “Inbox” section allows you to view and manage your incoming email messages. You can reply, forward, delete, or mark messages as spam.
Compose
The “Compose” section allows you to compose and send email messages to your contacts.
Drafts
The “Drafts” section allows you to save email messages that you are currently working on and return to them later.
Sent
The “Sent” section allows you to view and manage the email messages that you have sent.
Trash
The “Trash” section allows you to view and manage the email messages that you have deleted.
Contacts
The “Contacts” section allows you to manage your contacts and create contact lists.
Calendar
The “Calendar” section allows you to manage your appointments and schedule events.
Settings
The “Settings” section allows you to customize your Zmail account and manage your account preferences.
Managing Your Email
Zmail users can use the “Inbox” and “Compose” sections of their account dashboard to manage their email. Here’s how you can manage your email:
Compose a New Email
To compose a new email, follow these steps:
- Click on the “Compose” section of your account dashboard
- Enter the recipient’s email address in the “To” field
- Enter a subject for your email in the “Subject” field
- Enter the content of your email in the body field
- Click on the “Send” button
Reply to an Email
To reply to an email, follow these steps:
- Open the email message you want to reply to in your “Inbox”
- Click on the “Reply” button
- Enter the content of your reply in the body field 4. Click on the “Send” button
Forward an Email
To forward an email, follow these steps:
- Open the email message you want to forward in your “Inbox”
- Click on the “Forward” button
- Enter the recipient’s email address in the “To” field
- Enter any additional content or comments in the body field
- Click on the “Send” button
Delete an Email
To delete an email, follow these steps:
- Select the email message you want to delete in your “Inbox”
- Click on the “Delete” button
The email message will be moved to your “Trash” folder.
Mark an Email as Spam
To mark an email as spam, follow these steps:
- Select the email message you want to mark as spam in your “Inbox”
- Click on the “Mark as Spam” button
The email message will be moved to your “Spam” folder.
Managing Your Calendar
Zmail users can use the “Calendar” section of their account dashboard to manage their appointments and schedule events. Here’s how you can manage your calendar:
Schedule an Appointment
To schedule an appointment, follow these steps:
- Click on the “Calendar” section of your account dashboard
- Click on the date and time you want to schedule the appointment
- Enter the details of the appointment, such as the title, location, and duration
- Click on the “Save” button
Edit an Appointment
To edit an appointment, follow these steps:
- Click on the appointment you want to edit in your calendar
- Make the necessary changes to the appointment details
- Click on the “Save” button
Delete an Appointment
To delete an appointment, follow these steps:
- Click on the appointment you want to delete in your calendar
- Click on the “Delete” button
The appointment will be removed from your calendar.
Managing Your Contacts
Zmail users can use the “Contacts” section of their account dashboard to manage their contacts and create contact lists. Here’s how you can manage your contacts:
Add a Contact
To add a contact, follow these steps:
- Click on the “Contacts” section of your account dashboard
- Click on the “New Contact” button
- Enter the details of the contact, such as their name, email address, and phone number
- Click on the “Save” button
Edit a Contact
To edit a contact, follow these steps:
- Click on the contact you want to edit in your contacts list
- Make the necessary changes to the contact details
- Click on the “Save” button
Delete a Contact
To delete a contact, follow these steps:
- Click on the contact you want to delete in your contacts list
- Click on the “Delete” button
The contact will be removed from your contacts list.
Customizing Your Zmail Account
Zmail users can use the “Settings” section of their account dashboard to customize their Zmail account and manage their account preferences. Here are some of the key customization options available to Zmail users:
Account Settings
In the “Account Settings” section, you can customize your email signature, manage your vacation responder, and set up email forwarding.
Security Settings
In the “Security Settings” section, you can change your password, enable two-factor authentication, and manage app passwords.
Email Filters
In the “Email Filters” section, you can create rules to automatically filter and organize your email messages.
Theme Settings
In the “Theme Settings” section, you can customize the appearance of your Zmail account by selecting from a range of pre-designed themes or creating your own custom theme.
Keyboard Shortcuts
In the “Keyboard Shortcuts” section, you can enable and customize keyboard shortcuts to help you navigate and manage your Zmail account more efficiently.
Language and Time Zone Settings
In the “Language and Time Zone Settings” section, you can customize your account language and time zone settings to suit your preferences.
Zmail is a powerful email client that allows you to manage your email, calendar, and contacts in one place. Logging in to your Zmail account is quick and easy, and the platform provides you with a range of features and benefits to help you manage your email and stay organized. By following the tips and best practices outlined in this guide, you can make the most of your Zmail account and improve your productivity and efficiency when it comes to managing your email and other tasks. Whether you’re a new user or a long-time Zmail user, this guide has everything you need to get started and make the most of your Zmail account.