Discover the step-by-step guide for Aces Charting Login, providing comprehensive details and instructions. Access your Aces Charting account effortlessly with our user-friendly login process. Maximize your productivity and streamline your workflow with this convenient and informative resource. In this guide, we will discuss the Aces Charting Login process, how to overcome common login issues, and how to troubleshoot any problems you may encounter.
Aces Charting Login Process
ACES Charting is an electronic medical record system that allows healthcare professionals within the Air Force Medical Service to document patient care. The system is web-based, meaning that it can be accessed from any computer with an internet connection. ACES Charting is designed to be easy to use and navigate, allowing healthcare professionals to quickly and efficiently document patient care.
How to Access ACES Charting
Before you can access ACES Charting, you’ll need to have the proper credentials. Specifically, you’ll need a Common Access Card (CAC) and an active Air Force Medical Service account. Once you have these credentials, you can log in to ACES Charting using the following steps:

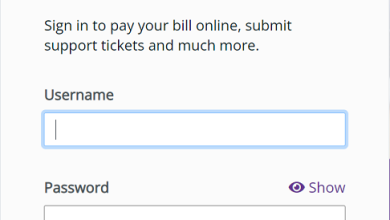
- Open your web browser and navigate to the ACES Charting login page. The URL for the login page is https://acescwa.afms.mil/ACE/Login.aspx.
- Insert your CAC into your computer’s smart card reader.
- Click the “CAC Login” button on the ACES Charting login page.
- If prompted, enter your CAC PIN.
- Once you’ve successfully logged in, you’ll be taken to the ACES Charting home page.
Navigating the ACES Charting Home Page
Once you’ve logged in to ACES Charting, you’ll be taken to the home page. The home page provides a dashboard of sorts, allowing you to quickly access various features of the system. Here are the main components of the ACES Charting home page:
The Menu Bar
At the top of the home page, you’ll see a menu bar with several options. Here’s what each option does:
- Home: Returns you to the ACES Charting home page.
- Patient Lookup: Allows you to search for a patient by name, social security number, or medical record number.
- Orders: Allows you to create, modify, and view orders for a patient.
- Notes: Allows you to document and view clinical notes for a patient.
- Results: Allows you to view lab results and other diagnostic test results for a patient.
- Reports: Allows you to generate reports based on patient data.
- Administration: Allows you to manage system settings and user accounts.
The Patient List
In the middle of the home page, you’ll see a list of patients. This list shows the patients for whom you’re currently responsible. To access a patient’s record, simply click on their name in the list.
The Quick Links Section
On the right side of the home page, you’ll see a section called “Quick Links.” This section provides links to frequently-used features of ACES Charting, such as creating a new patient record or printing a discharge summary.
Creating a New Patient Record
One of the primary functions of ACES Charting is to document patient care. To create a new patient record, follow these steps:
- Log in to ACES Charting as described above.
- Click on the “Patient Lookup” option in the menu bar.
- Enter the patient’s name, social security number, or medical record number into the search bar.
- Click “Search.”
- If the patient doesn’t already have a record in ACES Charting, click the “Create New Record” button.
- Follow the prompts to enter the patient’s demographic information, medical history, and other relevant information.
- Once you’ve entered all the necessary information, click “Save” to create the patient’s record.
Documenting Patient Care in ACES Charting
Once you’ve created a patient’s record in ACES Charting, you can begin documenting their care. ACES Charting allows you to document a wide range of clinical information, including:
- Vital signs
- Medications
- Procedures
- Lab results
- Imaging results
- Progress notes
- Discharge summaries
To document a patient’s care in ACES Charting, follow these steps:
- Log in to ACES Charting as described above.
- Click on the “Patient Lookup” option in the menu bar.
- Search for the patient whose care you want to document.
- Once you’ve found the patient, click on their name in the patient list to access their record.
- Select the appropriate section of the patient’s record (e.g. “Vital Signs,” “Medications,” “Notes,” etc.).
- Follow the prompts to enter the necessary information.
- Click “Save” to save your documentation.
Tips for Using ACES Charting Effectively
To get the most out of ACES Charting, it’s important to use it effectively. Here are some tips for using ACES Charting in a way that maximizes efficiency and accuracy:
Use Templates
ACES Charting includes a variety of templates that can be used to quickly document common clinical information. Using templates can save time and ensure that all necessary information is included.
Customize Your Workspace
ACES Charting allows you to customize your workspace by rearranging the order of sections and hiding sections you don’t use frequently. By customizing your workspace to suit your needs, you can streamline your workflow and reduce clutter.
Document Care in Real-Time
To ensure accuracy and completeness, it’s best to document patient care in real-time. This means entering information into ACES Charting as soon as possible after providing care to a patient.
Review Your Documentation
Before finalizing any documentation in ACES Charting, it’s important to review it for accuracy and completeness. Reviewing your documentation can help catch errors and ensure that all necessary information has been included.
Take Advantage of Training Resources
If you’re new to ACES Charting or need a refresher on how to use it effectively, take advantage of the training resources available. The Air Force Medical Service offers a variety of training materials, including online tutorials and in-person training sessions.
ACES Charting is a powerful tool for healthcare professionals within the Air Force Medical Service. By following the steps outlined in this guide and using ACES Charting effectively, you can streamline your workflow, improve accuracy, and provide better care to your patients. If you have any questions or need further assistance with ACES Charting, don’t hesitate to reach out to the Air Force Medical Service for support.